Visualizing Images:Displaying images using the default view: Magnifying and minifying images
From MIPAV
Revision as of 19:49, 10 February 2012 by Angelfish100 (Talk)
Magnifying and minifying images
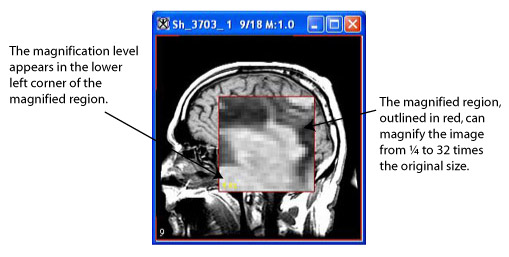
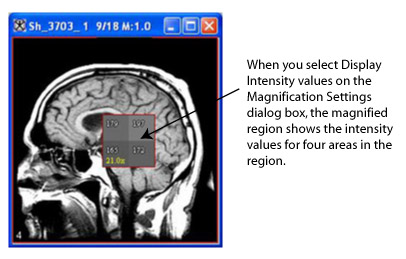
In the default view you can magnify or minify, or reduce, displayed images. When you display an image, the magnification level is indicated on the title bar of the window. For example, M:4.0 indicates that the image was magnified by a factor of four times the original size. You can also use the magnifying glass to temporarily magnify or reduce a region of the image. You can magnify images to 32 times their original size, reduce them to one-fourth their original size, or restore them to their original size.
Â
|}
In the MIPAV window, there are three methods for magnifying or minifying images:
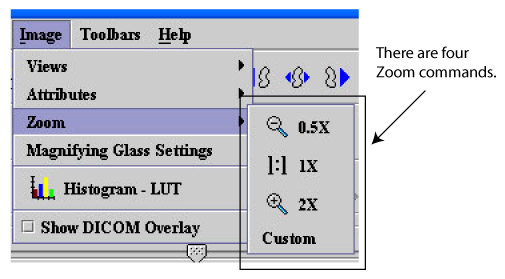
Automatically using three preset commands on the Image > Zoom menu
Manually using the Custom command on the Image > Zoom menu, which allows you to create other magnification levels
Automatically using the icons on the image toolbar
To set the magnification level automatically using the preset commands
1 Open an image.
2 Select Image > Zoom.
3 Select one of the following commands on the Zoom menu:
The software immediately changes the magnification level of the image.
|}
To set the magnification manually using the Custom command
To manually adjust the magnification level to a specific level that is not available through the preset commands or the icons on the image toolbar, do the following:
1 Open an image.
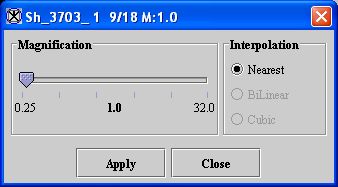
2 Select Image > Zoom > Custom. The Custom Magnification dialog box (Figure 6) opens.
3 Slide the marker in the Magnification slider to the specific level of magnification that you want to apply.
4 Select the interpolation method if desired.
Interpolation is the addition of one or more voxels between two other voxels. The interpolation mode is particularly important when an image is magnified (and voxels are seen more easily). Three interpolation modes are available: nearest, bilinear, and cubic (refer to Figure 6 for more information).
5 Click Apply. MIPAV applies the magnification level and interpolation mode to the image.
|
Magnification
|
Slide the marker left to decrease the magnification or right to increase the magnification. You can reduce the image to one fourth of its current size or enlarge it up to 32 times its current size. Notice that the number below the center of the slider changes as you slide the marker to indicate the magnification level.
|
{| align="center" |
|- |
Interpolation
| rowspan="1" colspan="2" |
Select one of the following methods:
Nearest-Short for nearest neighbor. The replicated voxel is assigned the color of the closest voxel. This mode yields more accurate results because other modes because the original values are retained. However, if applied, the image may have a choppy "stair-step" effect. It is also possible that some data may be lost or duplicated.
Bilinear-In this mode, the average of the four nearest voxels (to the newly interpolated voxel) is weighted. The interpolated voxel is then assigned the resulting color. If this mode is applied, the "stair-step" effect is reduced. However, because the view of the data is altered, it is not as accurate as the nearest neighbor mode.
Cubic-Short for cubic convolution. This mode is similar to the bilinear mode, except that the weighted average of the nearest sixteen voxels is used instead of the nearest four. If this mode is applied, the stair-step effect is greatly reduced. However, because the view of the data is altered, it is not as accurate as the nearest neighbor or bilinear modes.
|- |
Apply
| rowspan="1" colspan="2" |
Applies the magnification and interpolation you specified.
|- |
Cancel
| rowspan="1" colspan="2" |
Disregards any changes that you made in this dialog box and closes this dialog box.
|- |
Help
| rowspan="1" colspan="2" |
Displays online help for this dialog box.
|}

