Connecting to SRB BIRN
Connecting to SRB BIRN
In this chapter . . .
- Requesting the SRB account
- Setting MIPAV SRB options and opening files
- Setting the SRB connection parameters
- Uploading files to SRB BIRN
- Transferring files from MIPAV to SRB BIRN and vise versa
- Set up the NDAR pipeline
- Saving files to SRB
Biomedical Informatics Research Network (BIRN, http://www.nbirn.net/) is a shared biomedical IT infrastructure supported by NIH, which hastens the process of new understanding and treatment of disease through use of distributed knowledge. BIRN supports collaboration between groups with different expertise and resources (e.g., technical, scientific, social and political). The Storage Resource Broker (SRB), developed at SDSC, is a client-server middleware designed for managing file collections in a heterogeneous, distributed environment. All files within the environment are part of a single data grid BIRN file system where a file's logical location within the file system is represented independently of its physical location. The SRB middleware is capable of managing large data sets and is currently managing the BIRN data grid.
Get Connected to SRB BIRN
To be able to connect to SRB BIRN from inside MIPAV and open the image files using SRB you need to:
1 Obtain a SRB user account and/or NDAR portal user account, see Section "Requesting the SRB account"
2 Set up the MIPAV SRB options, see Section "Setting MIPAV SRB options and opening files"
3 Set up the SRB connection parameters, see Section "Setting the SRB connection parameters"
4 Upload your files to the SRB BIRN (optional), see Section "Uploading files to SRB BIRN" .
Requesting the SRB account
Before connecting to SRB BIRN from inside MIPAV, you should obtain the user account to the NDAR portal, first. In order to do that, connect to the portal using the following link:
https://nih-cit-dev-apps.nbirn.net/gridsphere/gridsphere?cid=ndar-login
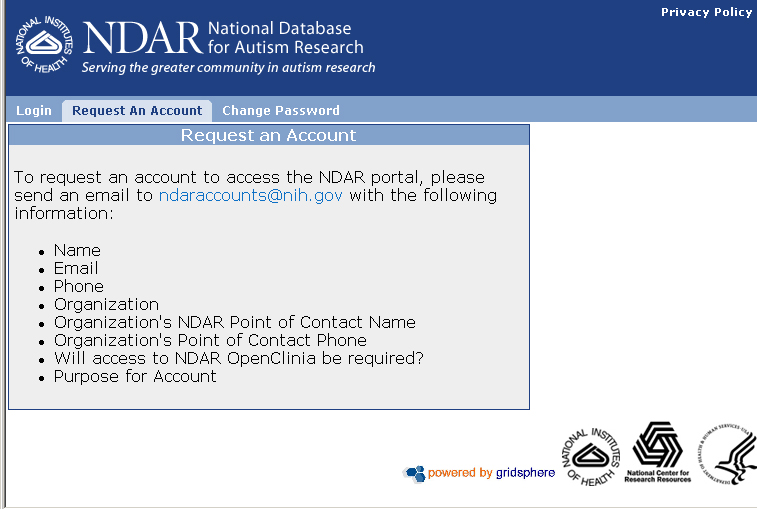
Then, open the Request an Account tab and follow the instructions provided by the tab. Refer to Figure 1.
After your request has been approved, you should receive the confirmation email from the NIH help desk. This email should contain your username and instructions on how to log in to the NDAR portal. At that time, log in to the NDAR portal, enter your email address that you entered in the account request, and create your password. Once you have done creating your password, you can log in to the NDAR portal using the username provided in the helpdesk email and the password you just created. [1]
Setting MIPAV SRB options and opening files
To set up the MIPAV SRB options:
1 Open MIPAV;
2 Call Help>MIPAV Options menu;
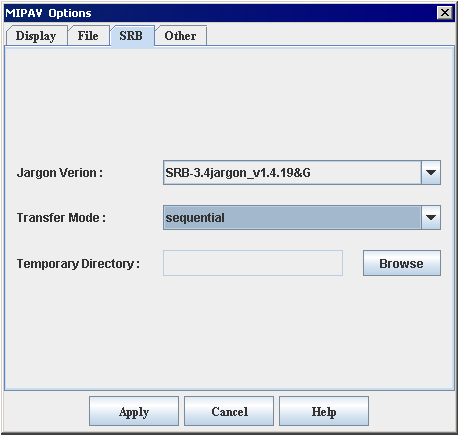
3 In the MIPAV options dialog box that appears, navigate to the SRB tab. See Figure 2
4 Complete the following tab options:
a version of Jargon API library, which should be used to communicate to the SRB server. Select one from the list;
Transfer Mode (parallel or sequential) - specify the file transfer protocol. There are SRB parallel transfer protocol and SRB sequential transfer protocol available;
Temporary Directory is your local directory, where you keep your files which need to be transferred FROM or TO the SRB server.
Setting the SRB connection parameters
The connection parameters that must be used to connect to SRB BIRN from inside MIPAV are slightly different from the parameters which you used to connect to the NDAR portal. To obtain these parameters,
1 From the NDAR portal page, navigate to the Data Management tab;
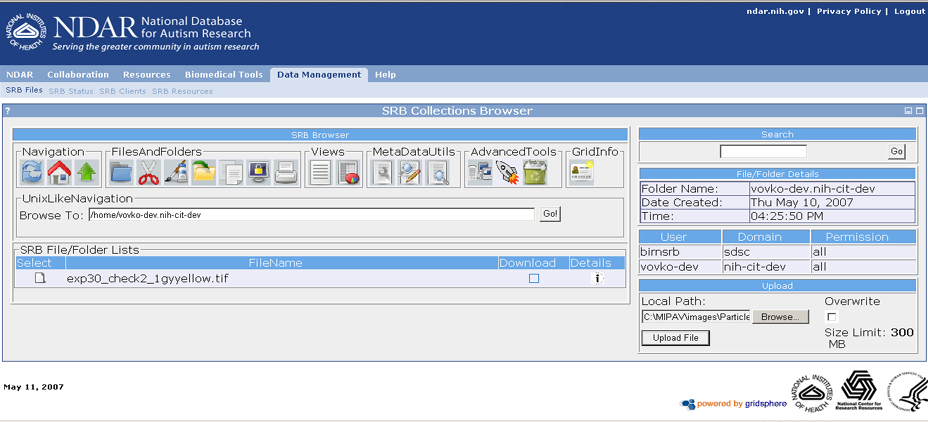
2 Click the GridInfo icon. See Figure 5
3 The info page appears displaying different sets of parameters;
4 You need those which appear under General SRB User Parameter;
5 Open MIPAV, and then call File>SRB BIRN>Open Image from SRB;
6 The Connect to dialog box appears;
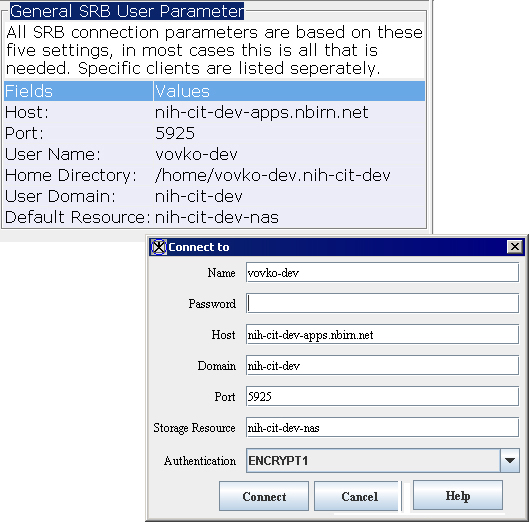
7 Enter parameters from General SRB User Parameter into the dialog box. Refer to Figure 3
8 In the Authentication list box, select ENCRIPT1;
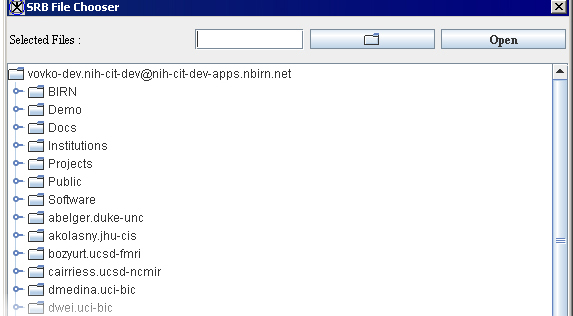
9 Press Connect, to connect to SRB server. The SRB File Chooser dialog should appear displaying the list of catalogs.
10 Open the desired catalog and select a file of interest. Press Open to open the file. See Figure 4.
11 The file now should be opened in MIPAV.
As shown in Figure 3 the following parameters are used to connect to SRB:
|
General SRB User Parameter
|
MIPAV
|
|---|---|
|
Host
|
Host
|
|
Port
|
Port
|
|
User Name
|
Name
|
|
Home Directory
|
|
|
user Domain
|
Domain
|
|
Default Resource
|
Storage Resource
|
Uploading files to SRB BIRN
To test your access to SRB BIRN from inside MIPAV, you might choose to upload a couple of files to your home catalog, first. In order to do that,
1 From the NDAR portal page, navigate to the Data Management tab;
2 Navigate to the Upload File box;
3 Use the Browse button to select a file for upload;
4 Then, click Upload File;
Later, you can upload your image files to SRB BIRN from MIPAV using the SRB Transfer and Save to SRB menus.
Transferring files from MIPAV to SRB BIRN and vise versa
To transfer files from MIPAV to SRB BIRN and back to MIPAV:
1 Use the MIPAV File>SRB BIRN>Open Image from SRB menu to connect to SRB BIRN;
2 Call File> SRB BIRN > SRB Transfer menu;
3 In the Transfer Files dialog box that appears, use the list boxes to specify the Source and Target directory (SRB and your local directory). Then, use the Browse buttons to select files and catalogs.
4 Press Transfer to send files. Or press Cancel to cancel. See Figure 6.
Set up the NDAR pipeline
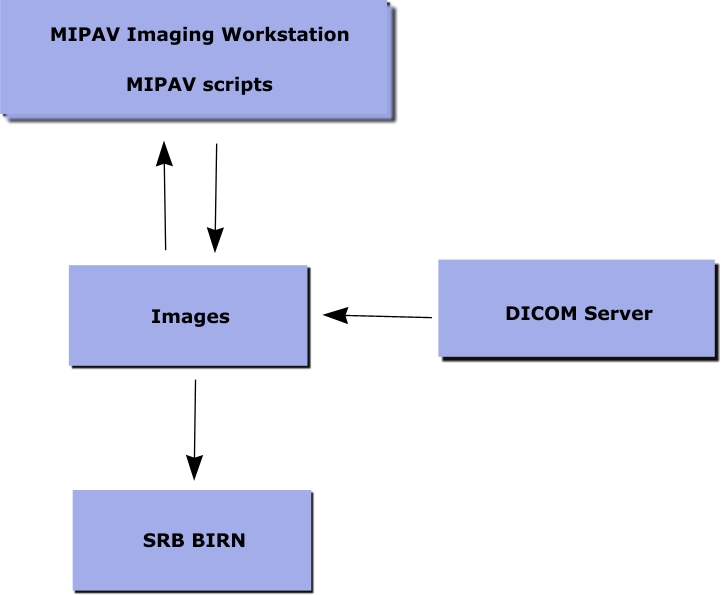
You can run MIPAV scripts on the DICOM images stored on the DICOM server and automatically save results to the chosen SRB BIRN catalogue.
In order to be able to do that, you should establish the NDAR pipeline, first.
1 Navigate to the File> SRB BIRN menu;
2 Here, check the Enable Auto SRB Upload option;
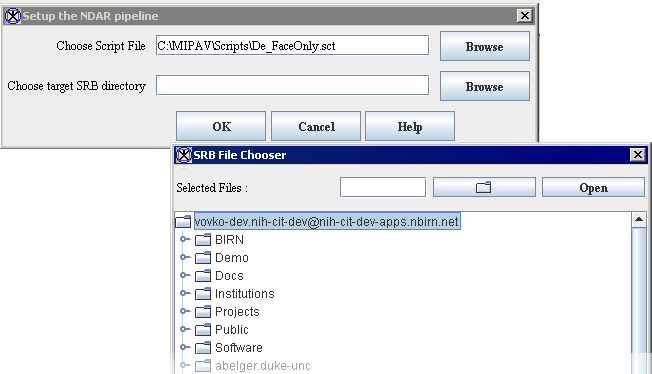
3 The Setup the NDAR Pipeline dialog box appears;
4 In the dialog box, first, select the MIPAV script which you would like to run;
5 Select the target SRB directory and press Open to confirm your selection.
6 Press OK to sun the script. Press Cancel to discard.
The script you choose should be run on the DICOM files and the results stored in the chosen SRB directory.
Note: that, you might be asked to login to SRB BIRN before you select the target SRB catalog. In that case, login to SRB as it was described in Section "Requesting the SRB account" and Figure 3.
Saving files to SRB
To save your image file directly to SRB:
1 Select the image file;
2 Call File>SRB-BIRN>Save Image to SRB menu;
3 The Connect to dialog box appears asking you to log in to SRB-BIRN;
4 Fill out the dialog box options as it was described in Figure 3. You need to enter only you password to SRB. All other information should be saved in the dialog box;
5 Press Connect;
6 In the SRB File Chooser dialog box that appears, select the catalog where you would like to save your file. See Figure 9
7 Press Save.
The file should now appear in the chosen catalog.
|
[ 1]https://nih-cit-dev-apps.nbirn.net/gridsphere/gridsphere?cid=NDAR |
