Difference between revisions of "Writing MIPAV plugins without MIPAV source code"
From MIPAV
| Line 31: | Line 31: | ||
== Building the Eclipse project == | == Building the Eclipse project == | ||
{| border="1" rules="all" cellpadding="5" | {| border="1" rules="all" cellpadding="5" | ||
| − | |+ '' | + | |+ ''Steps for building MIPAV.'' |
! Step | ! Step | ||
! Text | ! Text | ||
Revision as of 18:44, 11 March 2010
You can use Eclipse to develop plugins for MIPAV without access to the MIPAV source code.
Contents
Requirements
First, you'll need to download the following software. Note that Java may already be installed on your system. Find out what version of Java you have here.
- Java SE Development Kit. Version 1.5 or higher is needed. Download here
- Eclipse IDE for Java Developers. The current version is required. Download here
- A release of MIPAV. Available here
- The following files:
Installation
Installation should be completed in the following order.
Installing Java
Java installation simply requires following the prompts.
Installing Eclipse
Open the downloaded zip file. Unzip the entire contents to a convenient folder, such as C:\Program Files\
Installing MIPAV
Mipav installation is also quickly completed by following the prompts. Note where you installed MIPAV, by default this is in the folder C:\Program Files\mipav
Building the Eclipse project
| Step | Text | Picture |
|---|---|---|
| 1 | Start Eclipse. A dialog will ask you where the default workspace is located. Note the location it specifies and then click OK. With Eclipse started, click File, then New, then Java Project. | |
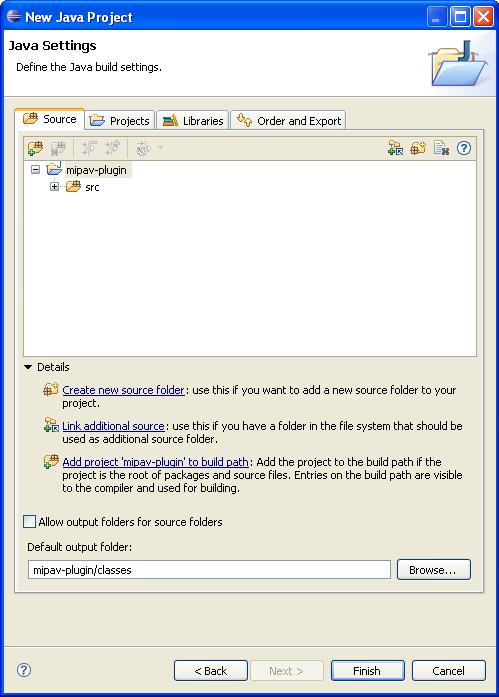
| 2 | Name your project mipav-plugin. Ensure that the button next to "Create seperate folders for source and class files" is checked. Click the Next button.
On the Source tab, change the Default output folder tab to "mipav-plugin/classes" |
|
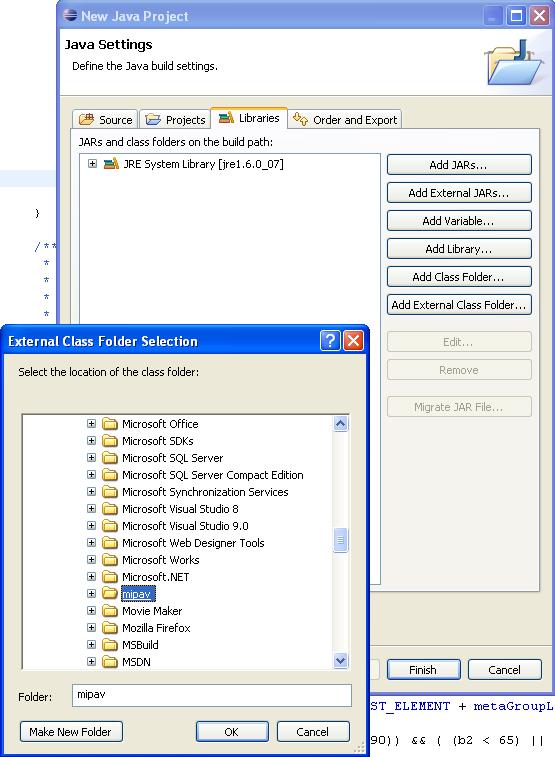
| 3 | On the libraries tab, click "Add External Class Folder" where you'll want to navigate to where you installed MIPAV. Select the corresponding folder. |


