Visualizing Images: Displaying images using the lightbox view
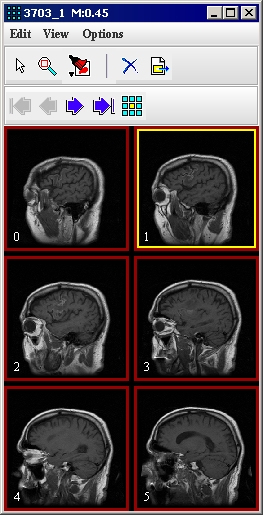
You can use the lightbox view to display datasets that have more than two dimensions (2D). Like its real-world counterpart, the lightbox view displays several images, or slices, in the dataset at one time in an image window. Through the lightbox settings, you can easily control the number of slices that appear.
To view an image dataset in lightbox view
1 Open an image dataset that has more than two dimensions. It appears in the image window in default view (Figure 1).
2 Select Image > Views > Lightbox in the MIPAV window. The image window for the lightbox view appears (Figure 1). The image number, or slice number, appears in the lower left corner of each image.
Notice that the image you originally opened in step 1 remains on your desktop. So you not only see the image dataset in the lightbox view, but you also see the image in the default view.
|
Edit
|
Select All-selects all of the slices in the dataset. Select None-deselects all of the selected slices. Invert Selections- deselects selected slices and select those that were not selected. Delete-deletes the selected slices from the dataset. Extract-copies the selected slices to a separate image window, which you can save as a separate dataset.
|
|
|
View
|
First Page-displays the first set* of slices in the dataset. Previous Page-displays the previous set* of slices in the dataset. Next Page-displays the next set* of slices in the dataset. Last Page-displays the last set* of slices in the dataset.
| |
|
Options
|
Settings-allows you to change settings for the number of rows and columns used to display images in the dataset, change the grid size and the size of the frame border, change the colors of the borders and frames, and the level of magnification. Save Settings-saves the settings currently set in the Lightbox Settings dialog box. Continuous Update-updates all of the displayed images when you make a change to one of the images.
| |
|
Displays the images according to the standard settings used by MIPAV when it is initially installed.
| ||
|
Magnifies a portion of the image from 1 to 32 times. To change the level of magnification or the size of the magnifier, right-click on the image, and the Magnification dialog box opens.
| ||
|
Updates the images displayed in the lightbox reflecting the changes made to the lightbox settings and to the dataset.
| ||
|
Removes the selected slices from the image dataset.
| ||
|
Makes a copy of the selected slices in the image dataset to a new image window.
| ||
|
Displays the first set* of slices in the dataset.
| ||
|
Displays the previous set* of slices in the dataset.
| ||
|
Displays the next set* of slices in the dataset.
| ||
|
Displays the last set* of slices in the dataset.
| ||
|
Displays the currently selected slice.
| ||
|
Go to slice
|
Specifies which slice you want to display. Type a number in this box and then select Enter to display the slice. The slice then appears in the lightbox view.
| |
|
Image window
|
Displays an individual slice in the dataset. To select a slice, click once on the slice. A thin red line appears around the slice inside the border.
| |
|
Border
|
Outlines each slice.
| |
|
Background
|
Provides the grid for the images in the window.
| |
</font></div>
Contents
Adjusting the lightbox view
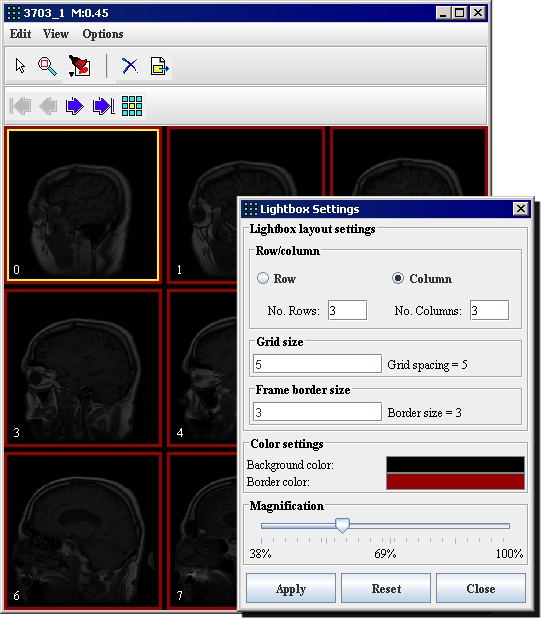
By default, the lightbox view shows only one column of images. Each image in the dataset is surrounded by frame borders and background (Figure 2). However, you can adjust the lightbox view so that you can see several columns and rows of images at a time (Figure 2) in a grid. You can also adjust the borders and the default magnification level of the images.
To change the grid configuration
1 Select Options > Settings in the image window for the lightbox view. The Lightbox Settings dialog box (Figure 2) appears.
2 Select Row.
3 Type the number of rows you want to appear in No. rows.
4 Select Column.
5 Type the number of columns in No. columns.
|
Row
|
Selects the row settings.
|
|
|
Column
|
Selects the column settings.
| |
|
No. rows
|
Specifies the number of rows that should exist in the lightbox view.
| |
|
No. columns
|
Specifies the number of columns that should exist in the lightbox view.
| |
|
Grid size
|
Indicates the spacing in pixels used for the grid size.
| |
|
Frame border slice
|
Indicates the spacing in pixels used in the grid.
| |
|
Background color
|
Allows you to choose the color of the background of the lightbox. When you select this icon, the Pick Background Color dialog box opens.
| |
|
Border color
|
Allows you to choose the color of the border that surrounds each image displayed in the lightbox. When you select this icon, the Pick Border Color dialog box opens.
| |
|
Magnification
|
Controls the level of magnification.
| |
|
Apply
|
Applies the parameters that you specified to the lightbox view.
| |
|
Reset
|
Returns all of the parameters to their default values.
| |
|
Close
|
Closes this dialog box without making changes to the lightbox view. If you changed the parameters in this dialog box, you must first select Apply to put those changes into effect.
| |
|
Help
|
Displays online help for this dialog box.
| |
6 Click Apply. Notice that the number of rows and columns in the lightbox view changed to the numbers you specified.
7 Continue to make changes to other lightbox settings.
8 Click Close to close the Lightbox Settings dialog box.
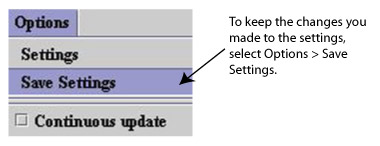
9 Click Options > Save Settings to save the settings as the default number of rows or columns for the next time you display the lightbox view.
To change the grid size
1 Select Options > Settings in the image window for the lightbox view. The Lightbox Settings dialog box (Figure 3) appears.
2 Type a number from 0 to 20 in Grid size (Figure 4).
File:MIPAV VisualizationTools110.gif
Grid size box
3 Click Apply. Notice that the grid size in the lightbox view changed to the size that you specified.
5 Click Options > Save Settings (Figure 5) to save the settings as the grid size for the next time you display the lightbox view.
To change the border size
1 Select Options > Settings in the image window for the lightbox view. The Lightbox Settings dialog box (Figure 3) appears.
2 Type a number from 0 to 10 in Frame border size (Figure 6). The unit of measurement for the number is in pixels.
Frame border size box
3 Click Apply. On the right of Frame border size, Border size changed to the size you specified.
4 Continue to make changes to other lightbox settings, or click Close to close the Lightbox Settings dialog box.
5 Click Options > Save Settings to save the settings as the default border size for the next time you display the lightbox view.
To change background and border colors
1 Select Options > Settings in the image window containing the lightbox view. The Lightbox Settings dialog box (Figure 3) appears.
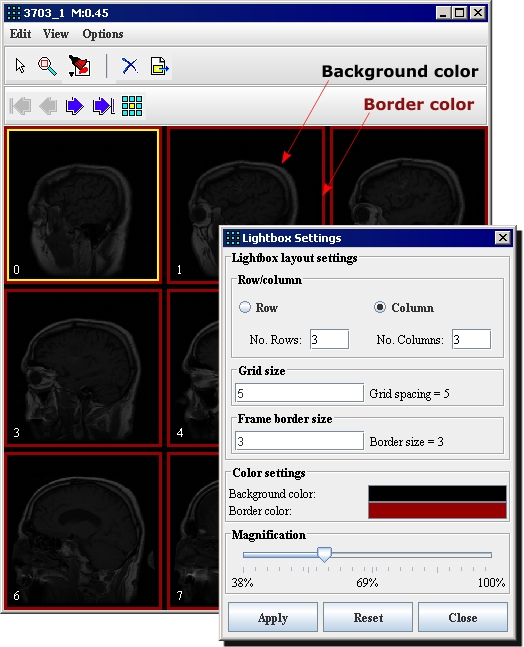
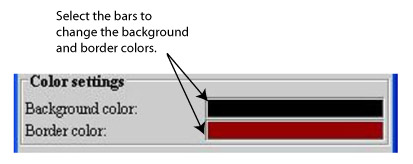
Notice that Background color displays the color of the current grid border, and Border Color shows the color of the current frame border.
2 Click the background color bar (Figure 8).
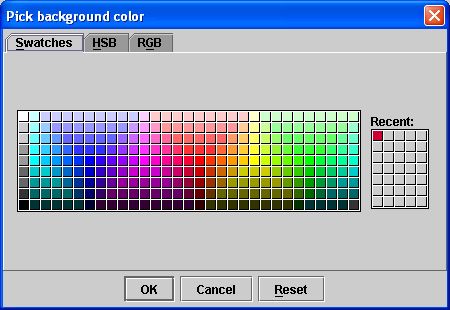
The Pick Background Color dialog box (Figure 9) opens.
Background color and border color bars
This dialog box includes three tabbed pages:
- Swatches page (Figure 9), which, by default, is always displayed first
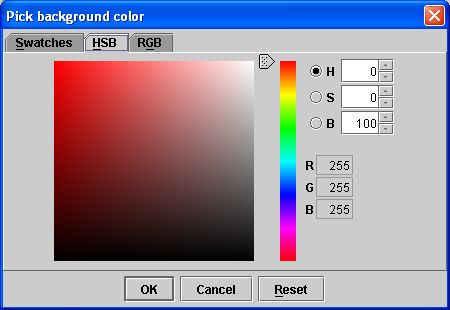
- HSB page (Figure 9)
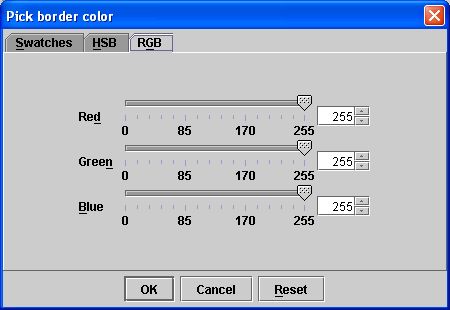
- RGB page (Figure 9)
You can change the color of the background on any of these pages.
Swatches page in the Pick Background Color dialog box
3 Select a color from the Swatches, HSB, or RGB page. (For instructions on how to select colors, refer to "Manually creating a mask using paint" in Chapter 6, "Segmenting Images Using Contours and Masks").
4 Click OK to apply the color to the background or border.
The Pick a Background Color dialog box closes, and the Lightbox Settings dialog box appears.
5 Click Apply.
Notice that the color of the background or border colors in the lightbox view changed to the colors you specified.
6 Continue to make changes to other lightbox settings, or click Close to close the Lightbox Settings dialog box.
7 Click Options > Save Settings in the lightbox view to save the settings as the default background and border colors for the next time you display the lightbox view.
To change the default magnification level for one slice in the dataset
1 Click ![]() .
.
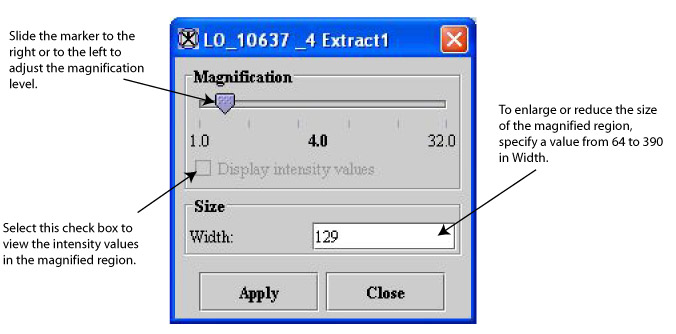
2 Right-click on the image. The Magnification dialog box (Figure 12) opens.
3 Change the magnification level by sliding the marker on the Magnification slider to the level you want.
4 Select Display intensity values if you would prefer to see the intensity values in the magnified region rather than the magnified image.
Magnification dialog box
5 Type a number from 64 to 390 to enlarge or reduce the size of the magnified region.
6 Click Apply. The settings specified in the Magnification dialog box take effect immediately and only for that one image, or slice.
To enlarge or reduce the size of all images
1 Select Options > Settings in the image window containing the lightbox view. The Lightbox Settings dialog box opens (Figure 3).
2 Select the level of magnification by moving the slider right or left to the appropriate value.
3 Click Apply. Notice that the image magnification changed to the magnification you specified.
4 Continue to make changes to other lightbox settings, or click Close to close the Lightbox Settings dialog box.
5 Click Options > Save Settings in the lightbox view to save the settings as the default magnification for the next time you display the lightbox view.
To return to the original settings for the lightbox view, click Reset in the Lightbox Settings dialog box.
</font>
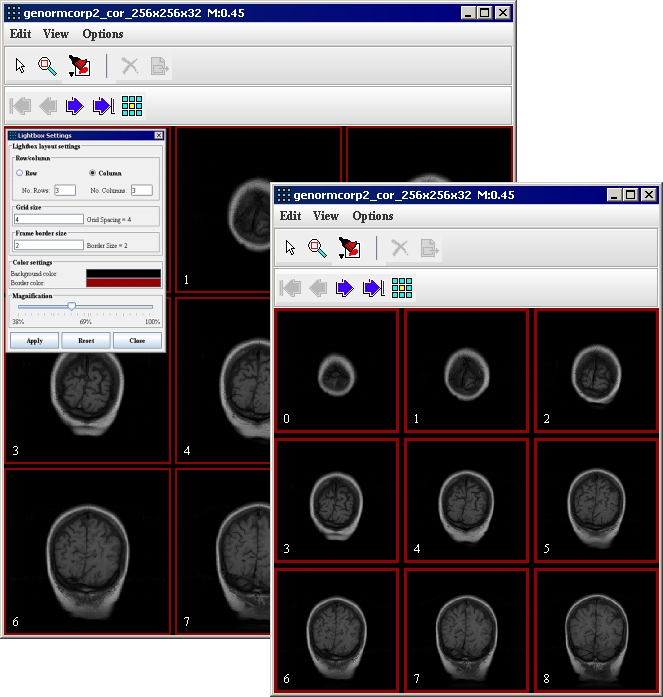
In the example shown in Figure 13, the researcher changed the original lightbox view (Figure 13A) in several ways. The number of rows was increased from two to four and the number of images in each row from two to three. The frame border color was changed from yellow to gray and the grid color from blue to black. Also the magnification level of the images was reduced to 38 percent of the original image size. Figure 13B shows the final lightbox view.
Repainting (updating) the lightbox
You can simultaneously display the same dataset in different views on your desktop. For example, you can display the dataset in default view and in lightbox view. If you perform an action on the dataset that is visualized in default view, such as contour a structure, you can update the dataset display so that the contours also appear in lightbox view. You can do this automatically or manually.
To automatically update the dataset in the image window
Select Options > Continuous Update in the lightbox view. The dataset is refreshed whenever a change occurs in the default image window.
Caution: Although this option is convenient, it may slow software response time if you are working with a large dataset.
To manually update the dataset in the image window<
Click ![]() , the Repaint icon, from the toolbar in the lightbox view.
, the Repaint icon, from the toolbar in the lightbox view.
To close the Lightbox window
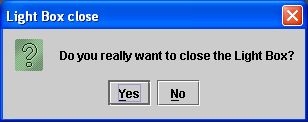
Click ![]() in the upper right corner of the Lightbox window. A confirmation message (Figure 13) appears. To close the window, click Yes and the Lightbox window closes. If you change your mind about leaving the lightbox view, click No.
in the upper right corner of the Lightbox window. A confirmation message (Figure 13) appears. To close the window, click Yes and the Lightbox window closes. If you change your mind about leaving the lightbox view, click No.
|
(A) original lightbox view (image on the left) and (B) changed lightbox view (image on the right)
|
Visualizing Images: Displaying images using the link to another image view
