Displaying images using the animate view
If you select the animate view, the software makes a copy of the image dataset and loads it into an image window showing the animate view. In animate view, like cine view, the software automatically advances through the entire image dataset. However, the animate view allows you to adjust the speed at which images are advanced. You can specify that images be displayed in forward or reverse order. You can also pause or stop the sequence.
To view an image dataset in animate view
1 Select Image > Views > Animate in the MIPAV window. The Animate Parameters dialog box (Figure 27) appears.
2 Type the scale factor that you want to use in the Scale factor box.
Figure 27. Animate Parameters dialog box
|
Scale factor
|
Changes the size of the dataset by the factor specified. Unlike magnification, the number of voxels used to replicate the image may change. For example, if you scale a dataset by a factor of 2, the image becomes twice the original size, and the number of voxels is squared.
|

|
|
Interpolation
|
Determines the intensity of the additional voxels using one of the three following methods: Bilinear-Weighs the average of the four nearest voxels (to the newly interpolated voxel). The interpolated voxel is assigned the resulting intensity. Bspline 3rd order-Weighs the average of the 27 nearest voxels (to the newly interpolated voxel). Bspline 4th order-Weighs the average of the 64 nearest voxels (to the newly interpolated voxel).
|
|
OK
|
Applies the scale factor and interpolation to the image dataset according to the specifications in this dialog box.
|
|
Cancel
|
Disregards any changes that you made in this dialog box and closes this dialog box.
|
|
Help
|
Displays online help for this dialog box.
|
3 Select one of the three interpolation methods.
4 Click OK.
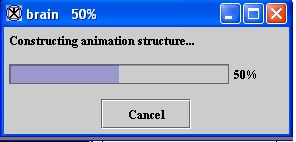
MIPAV transforms the dataset using the scale factor and interpolation method you indicated. A progress message (Figure 28) appears while the program constructs the animated file. It then loads a copy of the dataset in the Animate window.
.
Figure 28. Animate progress message
|
|
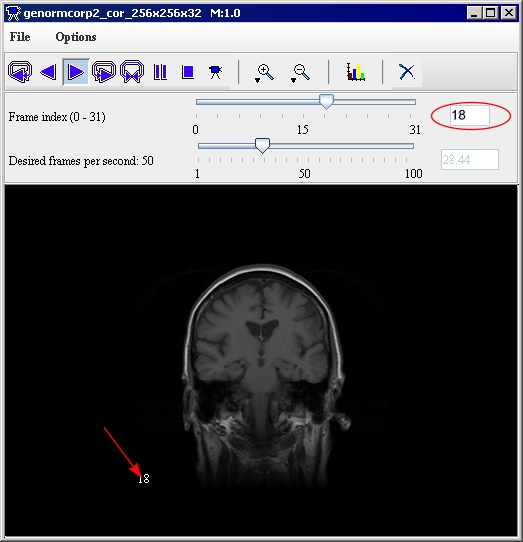
Figure 133. Image window shown in the Animate viewÂ
|
{| align="center"
|
|
|-
| rowspan="2" colspan="1" |
File
| rowspan="1" colspan="2" |
Save Image as .avi-Saves the dataset as an AVI, or digital video, file.
|-
| rowspan="1" colspan="2" |
Close Animate-Closes the Animate window.
|-
|
Options
| rowspan="1" colspan="2" |
Show Z Slice Numbers-Displays, if selected, the slice number, or the frame number, on the lower left side of the image.
|-
|
 Continuous reverse
| rowspan="1" colspan="2" |
Steps through all of the images in the dataset continuously in reverse without stopping at the speed specified in Desired frames per second.
|-
|
 Reverse
| rowspan="1" colspan="2" |
Steps through all of the images in the dataset once in reverse at the speed specified in Desired frames per second.
|-
|
 Forward
| rowspan="1" colspan="2" |
Steps through all of the images in the dataset once in sequence at the speed specified in Desired frames per second.
|-
|
 Continuous forward
| rowspan="1" colspan="2" |
Steps through all of the images in the dataset continuously without stopping at the speed specified in Desired Frames per second.
|-
|
 Backward and forward
| rowspan="1" colspan="2" |
Steps through all of the images in the dataset in sequence and then in reverse continuously without stopping at the speed specified in Desired Frames per second.
|-
|
 Pause
Pause| rowspan="1" colspan="2" |
Pauses the animation at the frame currently shown.
|-
|
 Stop
Stop| rowspan="1" colspan="2" |
Halts the animation and redisplays the first image in the dataset.
|-
|
 Magnify image 2.0X
| rowspan="1" colspan="2" |
Magnifies the image by 2.
|-
|
 Magnify image 0.5x
| rowspan="1" colspan="2" |
Magnifies the image by one-half.
|-
|
 Set brightness/contrast
| rowspan="1" colspan="2" |
Specifies the brightness and contrast of the image. When you select this icon, the Brightness/Contrast dialog box opens. To change the brightness, slide the Brightness slider to the level desired and then click Apply. To change the contrast, slide the Contrast slider to the level desired and click Apply.
|-
|
 Delete current slice
| rowspan="1" colspan="2" |
Removes the slice currently shown in this window from the image dataset.
Caution: The program does not allow you to undo slice deletion. Before you delete slices, you may want to have a backup of the complete image dataset to avoid losing images.
|-
|
Frame number
| rowspan="1" colspan="2" |
Sets the first image slice shown to the frame, or slice, number that you specify. Notice that the frame number appears in the box to the right of the slider.
|-
|
Desired frames per second
| rowspan="1" colspan="2" |
Specifies how many frames, or slices, should appear in 1 second. The read-only box to the right shows the actual number of frames per second your computer has achieved. The number of frames per second depends on the amount of memory accessible by the computer and CPU time.
|}
Adjusting dataset display
You can magnify or reduce the display of your dataset using the magnification icons. Use , the Magnify image 2.0x icon, to enlarge the image to twice its current size.
Adjusting the brightness and contrast in images
To adjust the brightness and contrast in the image, do the following:
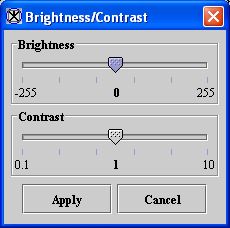
1 Click , the Brightness/Contrast icon, in the Animate window. The Brightness/Contrast dialog box (Figure 30) opens.
2 Move the Brightness slider to the position you want. Notice that the level of brightness changes on the image as you move the slider.
3 Move the Contrast slider to the desired contrast level. The contrast in the image changes as you move the slider.
4 Click Apply when you are finished. The image in the Animate window reflects the changes in brightness and contrast that you made.
5 Click  , the close button at the top right of the dialog box, to close the dialog box.
Figure 134. Brightness/Contrast dialog boxÂ
|
Brightness
|
Specifies the level of brightness to apply to the image.
|
{| align="center"
|
|
|-
|
Contrast
|
Specifies the level of contrast to apply to the image.
|-
|
Apply
|
Applies the brightness or contrast you specified to the image.
|-
|
Cancel
|
Disregards any changes that you made in this dialog box and closes this dialog box.
|-
|
Help
|
Displays online help for this dialog box.
|}


