Image Calculator: Advanced image calculator options
From MIPAV
Revision as of 15:58, 15 February 2012 by Angelfish100 (Talk)
Contents
Advanced image calculator options
To use advanced options provided by the Image Calculator dialog box, complete the following steps:
1 Open at least two images. The images must have the same dimensions.
2 Select Utilities >Image Calculator. The dialog box opens.
3 Use the Image B list box to select Image B.
4 Check the Clip option if you want to clamp result data to the bounds of the input image type. Check the Promote option to promote image type so that the range of the result fits into the new image type.
5 Use the Advanced button to call the advanced options. The Enter Advanced Operator dialog box appears.
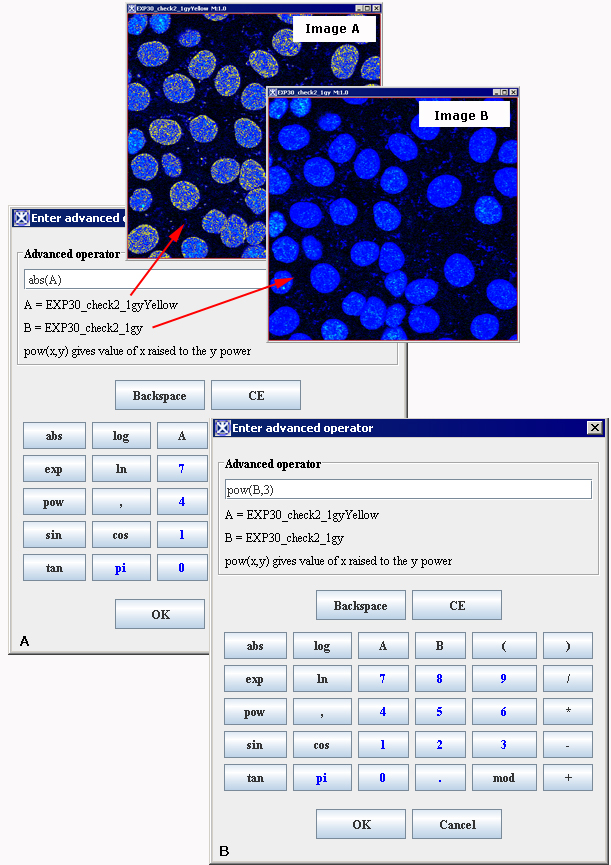
6 Use the dialog box options to perform any of the standard operations for which you would normally use a handheld calculator. Advanced operator performs on the images basic arithmetic, such as addition and subtraction, as well as functions found on a scientific calculator, such as logarithms and exponent.
Note: that in this dialog box you can combine images and constants in one math operation.
7 Click OK. The algorithm begins to run.
8 Depending on whether you selected New image or Replace Image A, the result appears in a new window or replaces the Image A to which the algorithm was applied.
Enter Advanced Operator dialog box
|- |
B=[file name]
|
Image B.
|- | rowspan="1" colspan="2" |
All available math functions can be entered in the Advanced operator text box manually or using the corresponding buttons.
|- | rowspan="1" colspan="2" |
Numbers also can be entered in the Advanced Operator text box manually or using the calculator buttons.
|- | rowspan="1" colspan="3" |
Backspace
Uses the same function as the Backspace button in the handlend calculator.
|- | rowspan="2" colspan="3" |
CE
Uses the same function as the CE button in the handlend calculator.
OK
Applies the algorithm according to the specifications in this dialog box.
|- |- |
Cancel
| rowspan="1" colspan="2" |
Disregards any changes that you made in this dialog box and closes it.
|- |
Help
| rowspan="1" colspan="2" |
Displays online help for this dialog box.
|- | rowspan="1" colspan="3" |
Figure 256. The Enter Advanced Operator dialog box options
|}
references
The parsing of the advanced operator expression is largely based on the file Func.java by Leen Ammeraal. The Func.java file appears at ftp://ftp.expa.fnt.hvu.nl/pub/ammeraal and http://home.wxs.nl/~ammeraal
It is also contained in Chapter 8 of Computer Graphics for Java Programmers by Leen Ammeraal, Copyright 1998 by John Wiley & Sons Ltd.
Image Calculator-Bulk Images
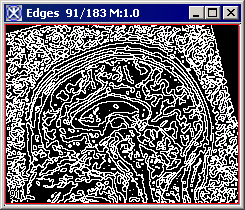
As for now, the Image Calculator-Bulk Images utility adds the pixel values of selected images. Basically, this operation adds the colors of the overlay to the background causing the two images ether overflow, or saturate. However, if the added colors excess the color limits, the color might be capped (or clamped) and the result might not necessarily be as you expect. See also Image Calculator, [MIPAV_Utilities.html#1176469 "clip mode" ]and [MIPAV_Utilities.html#1176475 "promotion mode" on page 438].
Image 1
|
Image 2
|- |
Image 3
|
Image 4
|- |
Image 5
|
Result
|}
image types
You can apply Image Calculator-Bulk Images to all 2D and 3D color and grayscale images. Images must have the same number of dimensions and the length of every dimension in each image must be the same. Also, all images must be color images, or grayscale images. There are no other restrictions on data type.
Applying the Image Calculator - Bulk Images
To run the utility, complete the following steps:
1 Open images which you would like to add. The images must have the same dimensions.
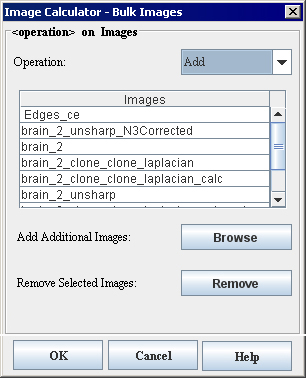
2 Select Utilities >Image Calculator-Bulk Images. The dialog box opens. See [MIPAV_Utilities.html#1297586 Figure 258].
3 The list of images appears in the Images window.
4 If you want to remove a certain image(s), select it, and then press Remove.
5 If you want to add images to the list press Browse, and then select the image(s) from your disk.
6 Check the Clip option, if you want to clamp result data to the bounds of the input image type. Check the Promote option to promote image type so that the range of the result fits into the new image type. Refer to [MIPAV_Utilities.html#1176469 "clip mode" on page 438] and [MIPAV_Utilities.html#1176475 "promotion mode" on page 438].
7 Click OK. The algorithm begins to run. And the result image appears in a new image frame.
|}


