Data Download module
Contents
Introduction
The data repository users can download selected datasets from the repository to their local machines. The Data Download tool (available via the Data Download module) assists users in this task. The tool runs locally as a Java Web Start application on a user's computer (requires the Java runtime environment).
System requirements
The most recent version of Java Runtime Environment (JRE) (6 or 7) is required in order to run the Imaging Data Submission and Validation module.
Module input and output
Module input:
- Data submitted to the repository by the Data Upload module..
Module output:
- Data downloaded to your computer- TBD.
Running the Data Download tool
- First, create and populate a download queue with datasets for download.
- Then, run the Data Download tool and download datasets from the download queue.
Steps to populate a download queue
- Navigate to Data Repository > Manage Studies.
- Click View Studies.
- In the list of studies that appears, find a study from which you wish to download a dataset(s).
- Make sure that the data types icons next to the study name are highlighted in color. That means that the study has datasets uploaded.
- Click on the study name/title.
- The study page appears.
- Navigate to the bottom of the page and expand the Data Set Submissions section. Click on the "+" sign to expand the section.
- The list of datasets submitted to the study appears. Note: in order to view and download datasets from a selected study you must have permissions to do that. Contact the Operations Team (TBD) in order to know your permissions.
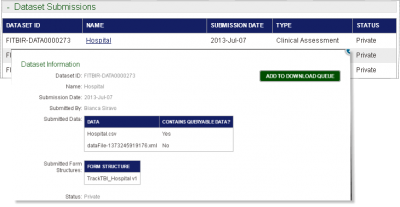
- Click on the dataset you wish to download.
- A pop-up window opens with information regarding the dataset. Note the big green Add to Download Queue button in the upper right corner.
- Click the Add to Download Queue button to add the dataset to the download queue. The the Add to Download Queue button changes to the "Added to download queue" status message.
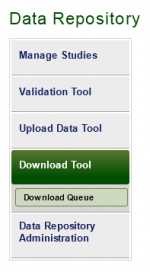
- To view the download queue navigate to Data Repository> Download Tool and scroll the page down. The list od datasets to download appears under the Download Queue section of the page.
The data types associated with a study are represented by three icons:
- Double helix - represents genomics data;
- Stethoscope - represents clinical assessment data;
- Head profile - represents imaging data.
If the icons next to the study name are highlighted in color, the study has datasets of the highlighted types.
Steps to run the Data Download tool
The Data Download module runs locally on your machine. In order to launch the module, navigate to the Data Repository > Download Data page and click the Launch the Download Tool link.
Note: the most recent version of Java Runtime Environment (JRE) (6 or 7) is required in order to run the module. Make sure your computer has it installed.
- Click Launch the Download Tool. In the Opening downloadTool.jnlp window that appears, select Open with Java(TM) Web Start Launcher (default) and click OK. In the Java Runtime Environment window that appears next saying "Do you want to run this application?", click Run.
- The EULE Agreement window appears displaying the data privacy user agreement. Read the agreement and click Accept if you agree.
- The Download Manager window appears.
- Select Download Location.
- Click the Browse Button.
- Navigate to the location on your computer of the working directory where you want the file to be downloaded. Select the folder, and then click Open.
- Select the files you want to download by clicking the check box next to the file name.
- Click Start Download. The screen will update as file(s) are being downloaded. If download is successful, the Status will be designated as Completed.
- Navigate to the working directory and open downloaded files.


