Cropping images
From MIPAV
Revision as of 17:39, 15 February 2012 by Angelfish100 (Talk)
Cropping images
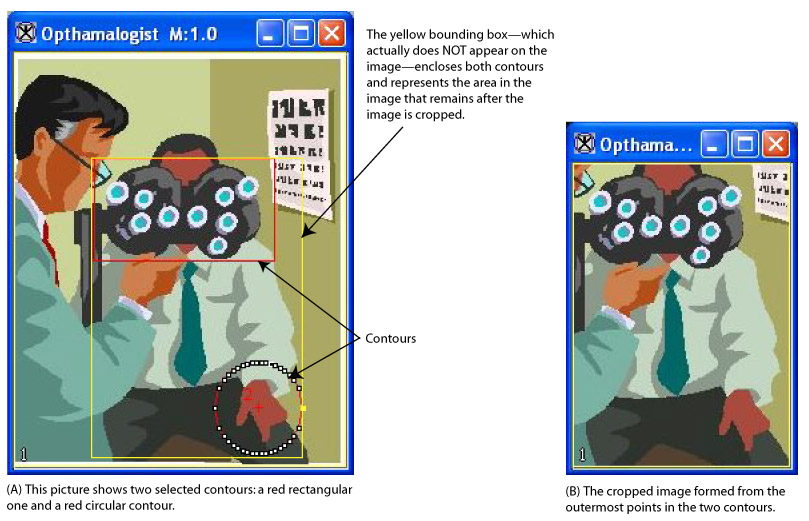
You can use the Crop command on the Utilities menu to trim an image so that only the selected portion of the image remains.
To crop an image using a VOI
1 Open an image.
2 Draw one or more VOI contours on the image on the area that you want to remain in the image. When the utility is run, the area inside the contours remains and the areas outside the contour are discarded from the new dataset.
3 Select the VOI or one or more of the contours.
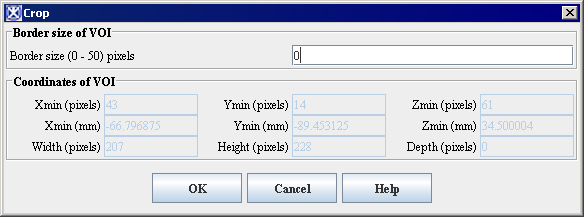
4 Select Utilities > Crop. The Crop dialog box (Figure 17) appears.
5 Type the number of pixels that you want to use for the border size in Border size box. Specify a number from 0 to 50.
6 Select either the New image or the Replace image check box to indicate whether the program should display the cropped image in a new image window or replace the original image with the cropped image.
7 Click OK. After a moment, the new image appears.
|
Border size of VOI: Border size (0 - 50)
|
Indicates the width of a strip of voxels that surround (border) the contours. When you crop an image, the area inside the contours and the border remain. All other voxels are trimmed from the image.
| |
|
Coordinates of VOI
|
Displays the coordinates for the X, Y, and Z axes of the VOI.
| |
|
New image
|
Shows the cropped image in a new image window.
| |
|
Replace image
|
Replaces the current active image with the cropped image.
| |
|
OK
|
Applies the parameters that you specified to crop the image.
| |
|
Cancel
|
Disregards any changes you made in this dialog box, closes the dialog box, and does not crop the image.
| |
|
Help
|
Displays online help for this dialog box.
| |
1 Open an image.
2 Call Utilities>Crop>Using parameters.
3 The Crop Boundary Pixels dialog box appears, see [MIPAV_Utilities.html#1173255 Figure ].
4 Select either the New image or the Replace image check box to indicate whether the program should display the cropped image in a new image window or replace the original image with the cropped image.
5 Complete the dialog box.
6 Click OK. After a moment, the new image appears.
|
| ||
|
Pixels around image
|
Specify the number of pixels which should be cropped. For 3D images also specify the number of slices at the front and at the back of the image.
|
|
|
Select destination
|
New Image - shows the cropped image in a new image window. Replace Image - replaces the current active image with the cropped image.
| |
|
OK
|
Applies the parameters that you specified to crop the image.
| |
|
Cancel
|
Disregards any changes you made in this dialog box, closes the dialog box, and does not crop the image.
| |
|
Help
|
Displays online help for this dialog box.
| |

