From MIPAV
Browsing DICOM images
MIPAV includes a browser that is specifically designed for examining DICOM images. The DICOM browser allows you to view a list of all of the images in a dataset and quickly display each one individually. The browser provides a fast way of locating and selecting specific image slices.
Tip: You can open a DICOM browser at any time after starting MIPAV; and, depending on your computer's memory resources, you can open more than one DICOM browser.
Displaying an image dataset in the DICOM browser
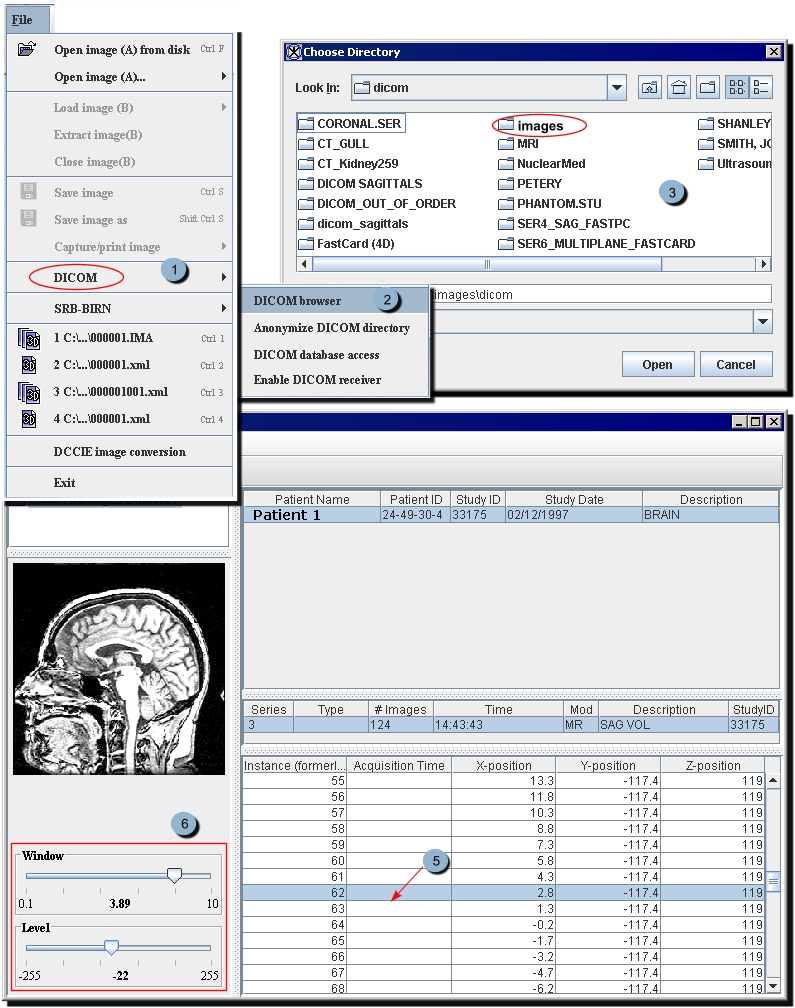
1 Select File > DICOM browser (see [MIPAV_DicomImages.html#1423667 Figure 57]-1, and [MIPAV_DicomImages.html#1423667 Figure 57]-2). The Choose Directory dialog box opens, see [MIPAV_DicomImages.html#1423667 Figure 57]-3.
2 Select the directory in which the DICOM image datasets are stored.
3 Click Open. The DICOM browser ([MIPAV_DicomImages.html#1423667 Figure 57]-4) appears showing the directory tree in the panel on the upper left of the window.
4 Navigate, if necessary, to the correct subdirectory and select it.
5 Click Parse directory ([MIPAV_DicomImages.html#1423667 Figure 57]-4). Information appears in the three panels on the right side of the window: patient and study information at the top, dataset information in the middle, and image information at the bottom.
6 Select one of the images listed in the image information panel ([MIPAV_DicomImages.html#1423667 Figure 57]-5). The image appears in the panel on the left side of the window below the tree structure ([MIPAV_DicomImages.html#1423667 Figure 57]-6).
You can now continue to browse the images, or you can perform one or more of the following tasks:
Adjust the image contrast and brightness, refer to [MIPAV_DicomImages.html#1332714 page 90];
Open selected images, refer to [MIPAV_DicomImages.html#1426700 page 90];
View another image dataset, refer to [MIPAV_DicomImages.html#1182225 page 90];
Create a movie from the image dataset, see [MIPAV_DicomImages.html#1180266 page 91].
Figure 57. Opening the DICOM browser and parsing the image directory
|
{| align="center"
|
|
|}
Tip: You can select consecutive slices by clicking the first slice, pressing and holding down Shift, and then clicking the last slice. To select nonconsecutive slices, press and hold down Ctrl and then click each slice.
To adjust image contrast and brightness in the DICOM browser
The Window and Level sliders that appear in the left bottom panel of the DICOM browser allow you to adjust both the contrast and brightness in the image being displayed. Refer to [MIPAV_DicomImages.html#1423667 Figure 57]-6.
1 Select a slice from the slice listing in the DICOM browser.
2 Move the Window slider to the right to lessen contrast or to the left to intensify contrast.
3 Move the Level slider to the right to increase brightness or to the left to decrease brightness.
To open selected images in the image dataset
 One of the advantages of using the DICOM browser is that you can quickly identify which images in the dataset you wish to work with. Once you've determined the required images, you can open just the slices you selected.
1 Display an image dataset in the DICOM browser.
2 Browse through all of the images in the dataset to identify the slice numbers of the images.
3 Select each of the appropriate slice numbers.
4 Select the Open Selected Images icon. MIPAV opens all of the slices in an image window. You can now use the Image Slice slider in the MIPAV window to view and work with each slice.
To view another image dataset
 Once you've opened the DICOM browser, you can quickly switch between working directories. In order to do that:
1 Click the New Top Directory icon. The Choose Directory dialog box opens.
2 In the dialog box, select a directory of interest.Click Open.
3 The DICOM browser appears showing the directory tree in the panel on the upper left of the window.
4 Navigate, if necessary, to the correct subdirectory and select it.
5 Now, click Parse Directory. Information about the new image dataset replaces the information about the previous dataset in the three panels on the right of the window. See also [MIPAV_DicomImages.html#1425941 "DICOM browser interface summary" on page 94].
To create a movie from the image dataset
 Using the DICOM browser you can create an *.AVI file or movie from the selected dataset or chosen slices.
1 Obtain and install, if you have not already done so, the following file from the Sun Java web site: jmf-2_1_1e-windows-i586.exe. This file installs file formats necessary for creating movies.
2 Display an image dataset of interest in the DICOM browser.
3 Browse through all of the images in the dataset to identify the slice numbers of the images you want to appear in the movie.
4 Select each of the appropriate slice numbers. Note that in order to create a movie, you must select at least two slices.
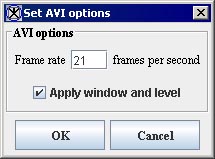
5 Select the Extract image to AVI movies icon. The Set AVI Options dialog box ([MIPAV_DicomImages.html#1183328 Figure 58]) opens.
6 Specify whether to subsample the image by 1, 2, 3, or 4.
7 Click OK. The Save dialog box opens.
8 Type a name for the movie in File Name.
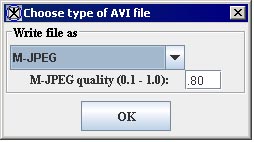
9 Click Save. The Choose Type of AVI File dialog box ([MIPAV_DicomImages.html#1436414 Figure 59]) opens.
10 Select one of the methods of writing the file.
11 Type the value for the M-JPEG quality if you selected M-JPEG as the writing method.
12 Click OK. A pop-up window appears with the status.
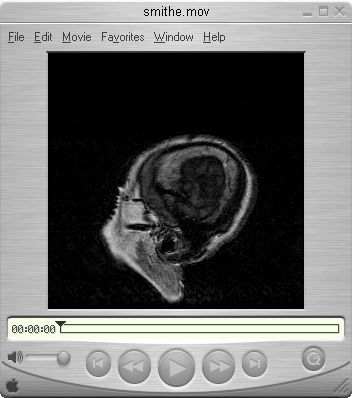
When the algorithm finishes running, the pop-up window closes. The movie is saved in the directory you specified, and, depending on the file format, the movie may appear in a new window.
Figure 58. Set AVI Options dialog boxÂ
|
Subsample image
|
Subsamples each image dimension by a factor of 1, 2, 3, or 4.
|
{| align="center"
|
|
|-
|
Frame rate
|
Specifies how many frames, or slices, should appear in 1 second.
|-
|
OK
|
Applies the parameters that you specified.
|-
|
Cancel
| rowspan="1" colspan="2" |
Disregards any changes you made in this dialog box, closes the dialog box, and does not save the file.
|}
Specifies the level of quality, which may be from 0.1 to 1.0, in the M-JPEG file type. This box is only available if you selected M-JPEG in the Write file as box.
Applies the parameters that you specified.
![]() One of the advantages of using the DICOM browser is that you can quickly identify which images in the dataset you wish to work with. Once you've determined the required images, you can open just the slices you selected.
One of the advantages of using the DICOM browser is that you can quickly identify which images in the dataset you wish to work with. Once you've determined the required images, you can open just the slices you selected.
![]() Once you've opened the DICOM browser, you can quickly switch between working directories. In order to do that:
Once you've opened the DICOM browser, you can quickly switch between working directories. In order to do that:


